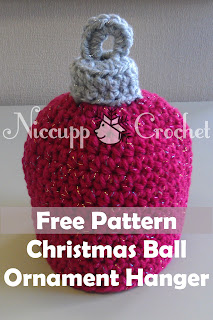
Supplies (for Ornament Topper Only):
Approx. 10 yards of Loops & Threads Impeccable Glitter Yarn in Gray
Size "H" Crochet Hook
NOTE: Do not crochet over the beginning tail. It is used to create the loop at the top of the ornament.
Begin with Magic Circle leaving a 6" tail.
Round 1: sc 8 times into Magic Circle and join with slip stitch to first sc of round.
Round 2: 2sc in each stitch around and join with slip stitch (16)
Round 3: Working in Back Loops only, hdc around and join with slip stitch (16)
Round 4: *sc, slip stitch* around. DO NOT JOIN. Cut the working yarn leaving a 36" tail. Then, join with invisible join (or slip stitch if you prefer).
The base of the ornament hanger is complete and the only thing left is to create the loop at the top.
The rest of this will be done in Steps with Photos.
Step 1: Insert hook through a few loops on the inside wall of the ornament base
Step 2: Grab the long tail and pull it all through the loops
Step 3: Pull it completely through
Step 4: Pull up a loop with the working yarn
Step 5: Pull up a loop from the beginning magic circle tail
Step 6: Using the working yarn, sc 12 times around the tail of the magic circle. Pull the working yarn through on the last sc.
Step 7: Pull the tail of the working yarn down to the inside of the ornament topper
Step 8: Pull the tail of the magic circle to shape the hanger loop
FINISH: Tie a knot using the magic circle tail and working yarn.
Any remaining length can be used as stuffing or you can use it to sew the ornament hanger onto your favorite beanie.
I have been working on this tutorial and perfecting the design for more than one month. If you search Etsy, you will find several Christmas Ball Ornament hats for sale. At the time I began designing the Christmas Ornament Topper, there was not a paid pattern available. I think they are super cute and it was fun to play with sparkly yarn. It is not my desire to detract from another person's income, but I am proud of what I came up with and always intended to share this idea for free.
You can attach the ornament topper to your favorite hat. Micah Makes has a great free pattern for a Versatile Earflap hat.
I used Loops & Threads Impeccable Glitter Yarn for the topper/hanger piece and the body of the hat.


Super cute! I'll definitely be adding this to my list of things to make :) Thanks!!
ReplyDeletethanks for the pattern and thanks for the ideas.
ReplyDeleteAm I missing something? How are you using the working yarn to crochet around the loop from the starting tail, if your working yarn is still hanging out the bottom/inside? I pulled up the loop of my working yarn like it says and shows in picture 4 but my actual working yarn is still hanging down/inside. I can't work with it on top that way.
ReplyDelete